tenancy cleaning inventory checklist on a sleek office clipboard, placed on a modern wooden dining table in a stylish central London apartment

End of Tenancy Cleaning Disputes That Begin With a Missing Check-In Report

Most end of tenancy cleaning disputes are not really about cleaning. They are about evidence – specifically, the absence of it. The check-in report is the document that establishes what a property looked like on the day a tenant took possession: the condition of the surfaces, the state of the appliances, the cleanliness of the floors, the marks already on the walls. Without it, any disagreement about how the property has been returned becomes a contest between two people’s recollections, and recollections are not something a deposit scheme adjudicator can work with. What follows is an examination of how that absence creates disputes, who carries the consequences, and what both parties can do about it.


What a Check-In Report Actually Is – and What It Needs to Contain

A check-in report is a timestamped, itemised record of the property’s condition at the start of a tenancy. Done properly, it covers every room in detail – the cleanliness and condition of all surfaces, fixtures, fittings, appliances, flooring, and walls – supported by dated photographs and signed by both landlord and tenant as an agreed record.

The quality of the document matters as much as its existence. A single-page list of rooms with the word “clean” beside each one is technically a check-in report, but it is of very limited use in a dispute. An adjudicator looking at a contested cleaning claim needs specificity: not “carpets – good condition” but a description of the carpet’s colour, apparent age, any pre-existing staining, and its condition at the time of check-in. The same applies to appliances, paintwork, and every other surface that might later become the subject of a deduction claim. A signed, detailed, photographically supported inventory prepared by a professional is the only document that reliably serves its purpose when a dispute arises.


The Legal and Regulatory Landscape

Tenancy Deposit Schemes and the Burden of Proof

Since 2007, landlords in England and Wales have been legally required to protect tenancy deposits in one of three government-authorised schemes: the Deposit Protection Service, MyDeposits, or the Tenancy Deposit Scheme. All three provide a free adjudication service for disputes, and all three operate on the same fundamental principle when it comes to cleaning claims: the burden of proof lies with the party making the deduction.

That means a landlord claiming that a property was returned in a worse condition than it was let must demonstrate that claim with evidence. A check-in report is the primary instrument for doing so. Without one, the landlord is presenting an assertion – and adjudicators are experienced enough to distinguish between the two. The consistent finding across all three schemes is that undocumented or poorly documented claims for cleaning deductions are difficult to sustain, regardless of the actual condition of the property at check-out.

What the Tenant Fees Act and Assured Shorthold Tenancy Framework Add to the Picture

It is worth being clear that the absence of a check-in report does not automatically resolve a dispute in the tenant’s favour. The regulatory framework rewards documentation on both sides. A tenant who has caused genuine damage or returned a property in a significantly worse condition than they received it cannot rely solely on a landlord’s failure to document the check-in position – particularly if there is other evidence available, such as estate agent records, utility readings, or correspondence during the tenancy.

What the framework does do is place a practical premium on documentation. A landlord who has invested in a thorough professional inventory is in a strong evidential position. One who has not is exposed – not because the law penalises them directly, but because adjudication without evidence tends to find in favour of the party who is not making the undocumented claim.


How a Missing Report Turns a Routine Check-Out Into a Dispute

The “It Wasn’t Like That When You Moved In” Problem

The central scenario is straightforward and familiar to anyone who works regularly in the lettings industry. The landlord – or more commonly the inventory clerk conducting the check-out – notes that the property has been returned in a condition that does not meet the standard at which it was let. The tenant disagrees. Without a check-in report, both parties are arguing from memory, and memory is selective, self-interested, and entirely inadmissible as evidence.

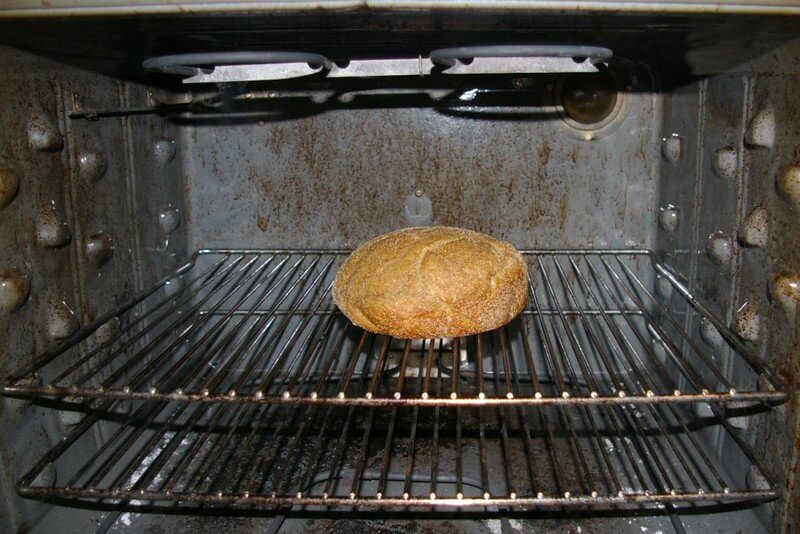
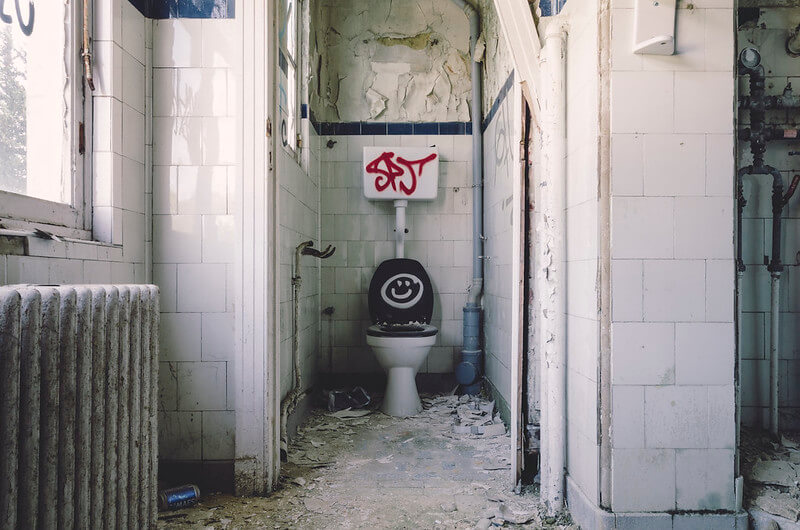
The oven is the most common flashpoint. A landlord who cannot demonstrate that the oven was clean at check-in is on uncertain ground claiming the cost of professional oven cleaning at check-out – even if the appliance is genuinely in a poor state. The same logic applies to carpets, walls, and bathrooms. Condition at the start of the tenancy is the only meaningful baseline, and without a document that establishes it, the entire argument rests on competing assertions that an adjudicator cannot fairly resolve.

When “Fair Wear and Tear” Becomes the Entire Argument

Fair wear and tear is the legal concept that acknowledges some deterioration of a property is inevitable over the course of a tenancy and cannot legitimately be charged to the tenant. Paint fades. Carpets flatten. Grout discolours. The question in any dispute is not whether deterioration has occurred, but whether it exceeds what would reasonably be expected given the length and nature of the tenancy – and that question can only be answered by reference to the condition at the start.

Without a check-in report, fair wear and tear becomes the entire argument, and it is an argument that cannot be properly resolved. An adjudicator faced with a landlord claiming that the carpets were in excellent condition at check-in and a tenant claiming they were already worn and marked has no basis on which to make a reliable finding. The absence of documentation does not clarify the situation – it makes it permanently ambiguous.


The Specific Cleaning Claims Most Likely to Unravel Without Documentation

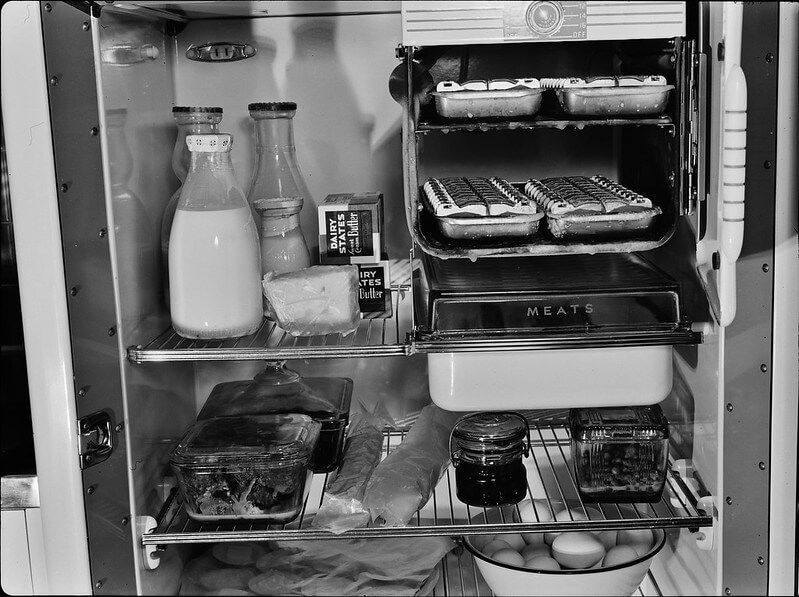
Oven and White Goods

Appliances represent some of the highest-value individual cleaning claims in a tenancy dispute. A professional oven clean in a London property typically costs between £80 and £150, and landlords will often seek to recover that cost in full. Without a check-in record showing the appliance was clean and in good working order at the start of the tenancy, that claim is vulnerable. Adjudicators are alert to the possibility that an oven returned in a dirty condition may not have been clean to begin with, and a landlord who cannot rebut that possibility with documentary evidence will frequently find the claim reduced or rejected.

Carpets and Flooring

Carpet claims are almost entirely dependent on baseline documentation. The legitimacy of a cleaning or replacement claim depends on the carpet’s condition at check-in, its age and quality, and the length of the tenancy – all factors that require a documented starting point. A landlord presenting a check-out photograph of a stained carpet without a corresponding check-in photograph showing it clean is providing half an argument. Adjudicators have seen that half-argument many times, and they treat it accordingly.

Walls, Paintwork, and Marks

In a standard tenancy, some marks on walls are inevitable and fall within fair wear and tear. Whether a specific mark or area of damage exceeds that threshold can only be determined by reference to what the paintwork looked like at the start. In higher-value properties – which account for a significant proportion of the rental stock in Kensington and Chelsea – redecoration costs can be substantial, and a landlord seeking to recover them without check-in documentation faces a difficult adjudication. The cost of a professional inventory is, in most cases, a small fraction of the claim it is designed to support.


What Landlords and Agents Get Wrong About Check-In Documentation

The most common failure is speed – a check-in report prepared in thirty minutes before a tenant picks up the keys, with a handful of poorly lit photographs and condition descriptions that amount to little more than “clean throughout.” That document will not survive serious scrutiny in an adjudication.

Other frequent shortcomings include inventories that are prepared but never formally signed by the tenant, photograph sets that capture the overall rooms but miss the appliances, the insides of cupboards, and the condition of individual carpet areas; and written descriptions that use relative terms without defining a reference point. “Good condition” means nothing unless there is a clear record of what “good” looked like on a specific date.

Professional inventory companies – which are standard practice among established letting agents in RBKC – produce reports that are detailed, timestamped, and formatted specifically for use in deposit scheme adjudications. The difference between one of those reports and a landlord-prepared equivalent is not merely one of presentation – it is the difference between evidence and assertion.


The Cleaner’s Perspective – What We See When There Is No Baseline

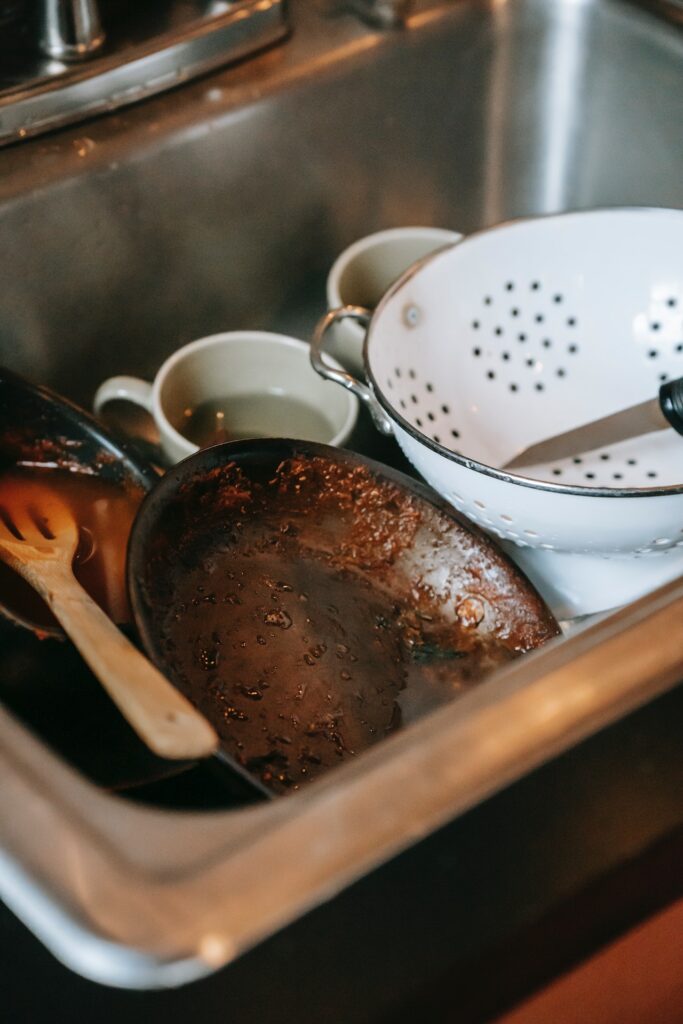
When a professional end-of-tenancy clean is carried out without a check-in report available for reference, the work itself is unchanged – the property is cleaned to the highest achievable standard regardless. What changes is the context in which that clean takes place.

Without a documented baseline, there is no way to calibrate expectations. A tenant who has commissioned a thorough professional clean has done what they can, but they are going into the check-out inspection without knowing what standard they are being measured against. In that situation, a detailed receipt from the cleaning company and before-and-after photographs taken at check-out provide at least partial evidential cover – they demonstrate that the property was professionally cleaned and in a specific condition when it was handed back, even if they cannot establish what it looked like at the start. That is not a substitute for a proper check-in report, but it is a great deal better than nothing.


How Both Parties Can Protect Themselves From Here

For landlords and managing agents, the answer is consistent and uncomplicated: commission a professional inventory before every tenancy, ensure it is signed by the incoming tenant, and retain a copy. Photograph every appliance, every carpet, every wall, and every room – in adequate light, with a date stamp. The cost is modest relative to the deposit values involved, particularly in a borough where even modest flats carry deposits of several thousand pounds.

For tenants, the key step is to request a copy of the check-in report at the outset of the tenancy and to read it carefully. Any inaccuracies – items recorded as clean that were not, damage that is not noted – should be raised in writing before the report is signed. At the end of the tenancy, comparing the check-in report against the current condition of the property before arranging the check-out clean is the most reliable way to identify where professional attention is needed and to manage expectations going into the inspection.


The Document That Decides Who Is Right

A check-in report is not administrative paperwork. It is the document that makes a fair tenancy possible – the agreed record of a starting point against which everything that follows can be honestly measured. When it is missing, disputes are not resolved on the basis of what actually happened. They are resolved on the basis of who documented their position more thoroughly, and the party that made no record at the start is at a structural disadvantage that no amount of subsequent argument can fully overcome.

In a rental market as active, as high-value, and as professionally managed as Kensington and Chelsea, that is a risk with real financial consequences. The disputes that are hardest to resolve – and the deposit deductions that sting the most – almost always trace back to a single missing document and a move-in day when no one thought to create one.

professional cleaner in London performing end of tenancy oven cleaning

How Tenancy Cleaners Deep Clean an Oven to Landlord Inspection Standard

Ask any experienced end of tenancy cleaner which single item causes the most check-out disputes, and the answer is almost always the same: the oven. It is not the bathroom grout, not the limescale on the taps, not even the mystery stain on the bedroom carpet. It is the oven – every time. The good news is that a professional tenancy clean brings a very specific set of tools, techniques, and standards to the job, and the result is something an inventory clerk or landlord can sign off without hesitation. Here is exactly how it is done.


Why the Oven Is the Make-or-Break Item on Any Check-Out Inventory

Baked-on grease is honest. Unlike dust, which can be shifted in twenty minutes with a cloth, carbonised fat and food residue on oven surfaces is cumulative – it builds up over months and resists anything short of a dedicated, methodical clean. Inventory clerks know this, which is why they look at the oven early and look at it closely.

In the Royal Borough of Kensington and Chelsea, the stakes are higher than in most London postcodes. Properties in W8, SW3, SW7, and SW10 tend to be high-value, and the letting agents and inventory companies that operate in the area are experienced professionals who carry check-in photographs and written condition reports. They know precisely what the oven looked like at the start of the tenancy, and they will compare it against what they find at check-out with considerable care. A failed oven clean is one of the most common grounds for a deposit deduction – and one of the most avoidable.


The Professional’s Toolkit – What We Bring That You Don’t Have Under the Sink

Caustic vs. Non-Caustic Degreasers – Choosing the Right Weapon

The cleaning products available in supermarkets are formulated for regular domestic maintenance – light grease, recent spills, surfaces that are cleaned weekly. They are not designed for the accumulated carbonised residue of a tenancy that may have run for one, two, or three years without a proper deep clean.

Professional tenancy cleaners work with two main chemical families. Caustic degreasers – typically sodium hydroxide-based – are powerful enough to break down heavy carbonisation on steel, cast iron, and vitreous enamel surfaces. Non-caustic alternatives use a different chemical action and are used on continuous-clean liners, aluminium components, and any surface where a caustic formula could cause damage. Choosing the wrong product does not just risk leaving the oven dirty – it risks damaging it, which creates a very different kind of deposit conversation.

The Soaking Kit and Why Time Is the Real Ingredient

The single most important element of a professional oven clean is one that no spray-and-wipe approach can replicate: dwell time. Removable components – racks, trays, side runners, and any removable door glass panels – are placed into soak trays or heavy-duty sealed bags with an appropriate degreaser solution and left for a controlled period. The chemistry does the work. Attempting to scrub components that have not been properly soaked is slower, less effective, and far more likely to leave residue behind. This is where most DIY attempts fall short – not through lack of effort, but through impatience.


The Step-by-Step Process – How We Actually Do It

Stage 1 – Strip, Assess, and Pre-Treat

Before any cleaning begins, every removable component comes out: wire racks, grill trays, side runners, the base plate, and – where the design allows – the inner door glass panels. This is also the moment to assess what you are dealing with. Light to moderate soiling calls for a different approach and dwell time than a heavily carbonised interior that has not been touched since the tenancy began.

Pre-treatment is applied systematically to interior surfaces – roof, back wall, side walls, floor, and door interior – and to all removed components. A professional will also check the elements that a DIY clean routinely misses: the fan cover at the back of fan-assisted ovens, the area around the door seal (where grease pools and hardens), the roof panel behind the grill element, and the runners on either side where accumulated drips are hidden from casual inspection.

Stage 2 – The Soak and the Interior Scrub

While the removed components soak, the interior is worked through in a deliberate sequence. The standard order is roof first, then back wall, sides, floor, and finally the door interior. Working top-to-bottom prevents re-contaminating surfaces that have already been cleaned.

The tools used at each stage matter. Plastic scrapers remove carbonised deposits without scratching enamel. Nylon scourers handle residue that the scraper leaves behind. Narrow brushes reach into the channels along the base and the recesses around the elements. Each section is wiped clean of both grease and degreaser before moving on. On soaked components, the same logical progression applies – a brief scrub is usually sufficient once the dwell time has done its job, though heavily soiled racks may need a second application.

Stage 3 – The Door Glass (The One That Always Betrays You)

Experienced inventory clerks go straight to the door glass, and for good reason. It is the most visible surface in the oven and the one most likely to reveal a superficial clean. Wiping the inner-facing side of the front glass panel is not enough – in many oven designs, grease migrates between the glass panels over time and is visible as a brown or smoky film that cannot be reached without partial disassembly.

Where the design permits, the door is removed and the glass panels are separated carefully to allow cleaning between them. Where this is not practical, the visible surfaces are cleaned to the highest achievable standard, and the condition is noted. On the outer glass, the technique is streak-free and residue-free: the right cloth, the right finishing product, buffed dry. A smeared oven door fails an inspection just as surely as a dirty one.

Stage 4 – Rinse, Dry, Reassemble, and Final Inspection

Chemical residue left in an oven is both an inspection failure and a safety issue – it will smoke or smell on first use, which is not something a new tenant or returning landlord will miss. Every treated surface is wiped down thoroughly with clean, damp cloths until no trace of degreaser remains. Components are dried before reassembly, because moisture trapped inside an oven is a separate problem.

Reassembly follows the reverse of the strip-out, with each component checked as it goes back in. The final inspection mirrors what an inventory clerk will do: a torch check of the interior from every angle, the door opened and closed to check the seal area, the glass inspected under direct light. If anything needs attention, it is addressed before the clean is signed off – not discovered during the check-out.


What “Landlord Standard” Actually Means in Practice

The phrase causes more anxiety than it should. “Landlord standard” does not mean the oven must look as though it rolled off a production line that morning. It means it should be as clean as it was at the start of the tenancy – that is the legal and practical benchmark, and fair wear and tear is accounted for within that definition.

What matters is that the condition at check-out is at least equal to the condition recorded at check-in – in the written inventory and, increasingly, in photographic records. A professionally cleaned oven is also a documented one: many end-of-tenancy cleaning companies provide a receipt or written confirmation of the work carried out, which gives tenants evidence to present if a deduction is disputed. In a rental market as active and well-documented as RBKC, that piece of paper has genuine value.


The Honest Truth About DIY Oven Cleaning Before a Check-Out

It can be done. A motivated tenant with the right products, sufficient time, and a willingness to spend several hours on their knees can achieve a result that will pass a check-out inspection. The conditions for that outcome are, however, fairly specific: the oven cannot be in a severe state of soiling, the tenant needs access to a proper degreaser rather than a supermarket oven spray, and the clean needs to happen with enough time to do the job thoroughly rather than in a last-minute panic.

Where DIY most commonly fails at check-out is not effort but chemistry and time – the wrong product, insufficient dwell, and an interior that looks clean in ordinary light but reveals residue the moment a torch is applied. A professional clean costs money; a deposit deduction costs more.


Why End-of-Tenancy Cleaning in Kensington and Chelsea Demands Precision

The rental market in RBKC operates at a level where standards are high and expectations are clearly documented. Inventory companies working in this borough are thorough – they are appointed by landlords and agents who expect a detailed report, and they deliver one. A check-out inspection here is not a casual walkthrough.

That context shapes how professional tenancy cleaning should be approached in this part of London. It is not enough to clean to a general standard and hope for the best. The clean needs to be systematic, evidenced, and benchmarked against the original check-in condition. For the oven above all else, that means treating it not as a kitchen appliance to be wiped down, but as the most scrutinised item in the property – and cleaning it accordingly.


The Oven Test – and What Passing It Actually Means

There is an informal rule among experienced inventory clerks: if the oven is clean, the rest of the property usually is too. It is the item that separates a genuine professional clean from a surface tidy. Passing the oven test means something – it means the clean was thorough, methodical, and carried out to a standard that holds up to documentation and scrutiny.

For tenants moving out of a property in Kensington and Chelsea, that distinction is worth taking seriously. The deposit attached to a flat or house in this borough is not an incidental figure, and the oven is one of the most reliable ways to protect it.

Eight Tasks That Must Be On Your End Of Tenancy Cleaning Checklist

I know – there’s a lot to do when you’re moving out of your old house and into a new one. However, ensuring that your old house is beautifully clean is very important, especially if you’re moving out of a rental property because proper cleaning means you are very likely to get your deposit money. (I’d like to say you’re guaranteed to get your deposit money back, but one does run across difficult landlords who are impossible to please and who find all kinds of excuses, no matter how well you’ve cleaned the place when moving out.) In the case of selling your old house and buying a new one, you’re more likely to sell your house quickly if it’s nice, clean and attractive to prospective buyers.

What with one thing and another, it can be very easy to overlook some tasks when you do the big cleaning before moving out. It’s understandable – after all, there are some things that one only seems to clean during an end of tenancy cleaning or during fanatical sessions of spring cleaning. Nevertheless, landlords can and will check these places and insist on cleaning them properly. This is why you need to make sure that you have these tasks on your end of tenancy cleaning checklist.

Why You Need A List

For a start, you need to make sure that you have a list in the first place. Professional end of tenancy cleaning companies always use a checklist and that’s because when there’s a list of tasks to be done and places to clean, having a list means that every job will be done and nothing will be overlooked. When you’ve got a team of people on the job, a list also means that you won’t get the problem of someone wasting time trying to do a job that’s already been done. With a checklist, everybody knows where they are. Besides, it’s satisfying to cross all those tasks off the list!

Of course, if the list of tasks that need to be done as part of moving out cleaning is overwhelming, you could always call in a professional cleaning company to do the moving out cleaning for you. It’s not cheating!

OK, so now that you know you need a list of things to do so you don’t forget anything, what needs to be on the list? You’ve probably got things like vacuuming and wiping countertops on the list already (haven’t you?), but what about the other things, the things that are often forgotten? Well, here are eight tasks that need to be on there…

#1: Skirting Boards

Skirting boards, baseboards, dado rails, and architraves are real dust magnets. Most of the time, we just take them for granted and don’t really look at them unless we spill chutney or mustard on them (if this happens to you, act quickly; mustard stains). However, a thick layer of dust on these horizontal design elements really lowers the tone of the house. Make sure that they get dusted and wiped down. Even higher elements like architraves collect a surprising amount of dirt and (please, no!) mould.

#2: Inside The Oven

Oven Cleaning is Important in a Deep Clean

This may well be your least favourite job. If it is, you’re not alone. There’s no denying that getting all the old burned-on food and grease off the inside of the oven and the racks inside it is a tough job – and some landlords want to find a perfectly clean oven when they inspect the property. You can try doing it the natural way with baking soda and aluminium foil (and plenty of elbow grease!), or you can try one of those harsh chemical sprays (get the kids out of the house first and be sure to follow all the safety precautions). Nevertheless, it needs to be done, so don’t shirk the job. Make sure you also clean the range hood or extractor fan as well; these can pick up quite a lot of grease, even if you don’t fry much.

#3: Behind The Fridge

Cleaning Behind The Fridge

You never know what you’ll find lurking behind the refrigerator, from the spare keys to (if you’re really lucky) a few coins. However, what you’re most likely to find is dust, grime and debris. If you own the refrigerator, you’ll need to haul it out from where it’s been standing and give the floor and walls a good going-over as part of your moving out cleaning. If the fridge came with the house and your landlord owns it, then you still need to pull it out to clean the walls and floor behind the fridge – and the back of the fridge itself!

I’m assuming that you already know to clean the inside and front of the fridge. Defrosting the freezer unit can also be a nice touch, but this isn’t too hard: simply switch off the (empty!) fridge-freezer and put a towel or five in the freezer to absorb the melting water.

#4: Curtains

Curtains collect a surprising amount of dust, and they’ll need to be cleaned before you move out. Lace and net curtains can be taken down and washed by hand easily enough, as can some types of unlined curtains, although you may need to iron the curtain (on low!) afterwards. Thermal and lined curtains tend to be a bit trickier, and you will probably need to call in a professional or take the curtains down to your nearest dry cleaning agent.

Don’t forget the shower curtain – at least this can be tossed into the washing machine on cold and air-dried. If only everything was that simple!

#5: Cupboards

Every single cupboard, drawer and wardrobe in the house needs to be emptied out and wiped down inside and out. Sometimes, the amount of dust and grime that comes out during this process is staggering. “I was keeping my towels in that?” you might ask yourself.

If you’ve lined the bottoms of cupboards and drawers with paper (either fancy paper or recycled newspapers), then the job is a lot easier, as a lot of the gunk will come out on the paper, especially in kitchen cupboards. However, give the cupboards a good wipe after you’ve removed the liners.

#6: Walls

Walls need to be wiped down to remove fly spots, scuff marks, random spots of mysterious substances and the traces of the time your toddler got hold of a pencil while you were giving your attention elsewhere. Most painted surfaces are fairly easy to wipe down, as modern paints tend to be designed to be washable. You have to be a bit more careful with wallpaper, which can be worn away by rubbing and scrubbing.

Don’t forget to get right into the corners of the walls – this is where you’ll often find spiders.

#7: The Toilet – All Of It

How To Clean Dirty Toilets

Yes, you’ve cleaned the bowl and wiped the seat. However, depending on the accuracy of the males in your household, you may also need to take the seat right off and clean under the hinges. Don’t forget to clean around the outsides and back of the bowl as well as more obvious places like the top of the tank.

#8: Rubbish Bins

Empty and Clean The Rubbish Bins

Lastly, you should make sure that there isn’t any rubbish or recycling left in the bins. Would you want to move into a place that had someone else’s old rubbish filling the bins right when you need to get rid of packaging waste and recycling? Of course not! Make sure that the bins go out for collection (and get them back in again) before you hand over the keys. If you make any other rubbish or recycling after that last collection day, then take responsibility for taking it to the rubbish dump or recycling centre, as appropriate.

Bad Cleaning Habits You Must Stop

We are all searching for ways of making cleaning faster and easier. Believe it or not, sometimes using “shortcuts” actually makes it more complicated in the long run. You and your family might even have developed some bad habits that interfere with your ability to do work more efficiently (you may even damage your home!)

It’s time to start correcting these habits so you can get to a cleaner home faster. Here’s an excellent way to start: Choose one or two lousy cleaning habits to change each week. You will soon have a cleaner home and more free time for things you like!

Too much paper accumulated in your home

Don't let paperwork clutter your home.

Even with online billing and banking nowadays, there is still a mountain of paper in our homes. Magazines, newspapers, school newspapers and projects continue to accumulate. Don’t let that happen.

Designate a location near the entrance for all mail, periodicals and paper forms. Sort and throw them at least once a week.

Just make files on essential paper documents such as receipts. Take digital photos, and read your favourite articles online instead of buying magazines.

Using too many cleaning products

You think that if a bit of detergent works, then more of it will work better and faster. But this is not the case. Using too much detergent can do more damage than help. The residue becomes a magnet for dirt if the overabundance of cleaning products is not rinsed. So, you should peruse the instructions and always use the recommended amount or even a little less. You waste time and money on the extra product and water to rinse it off.

Cleaning with dirty tools

How can you expect clean results when using dirty cleaning tools? Your clothes will smell if your washing machine has accumulated bacteria in detergent residues. If the bag or filter in the vacuum cleaner is full of dust, it will no longer do a good job of sucking. A dirty mop or sponge pushes out more dirt and bacteria.

Take the time to thoroughly clean the appliances after each use by emptying them or washing them in hot water and adding disinfectant. Replace periodically with new tools.

Use disinfectant wipes to clean the entire bathroom

Disposable disinfectant wipes are great for quickly wiping the sink in the bathroom. But this little wipe hardly contains enough disinfectant to clean an entire bathroom. When you get to the toilet seat and handles, the disinfectant properties are gone, and you’re spreading bacteria from one surface to another.

The wipes must be sufficiently moistened and wet with disinfectant to be effective so that the surface remains wet for about four minutes. For thorough cleaning, use several clean wipes and enough disinfectant.

Leaving dirty dishes in the sink

Do not leave the dirty dishes in the kitchen sink

What time will it take to place a grimy glass in the dishwasher rather than in the sink? Leaving dirty dishes in the sink is ideal for microorganisms to duplicate and nourish hungry insects.

Teach everybody in the family to either place the dishes in the dishwasher or wash them immediately.

Wearing outdoor shoes in the house

It takes only a couple of seconds to take off your shoes each time to come back from the outside. It will save you long stretches of vacuuming. Also, the microorganisms and microbes will stay outside your home.

Make this habit easier for everyone by providing a bench or chair for easier shoe removal. Keep a box for wet or muddy shoes nearby.

Improper storage of cleaning products

Do you spend half of your cleaning time trying to find the right cleaners and tools around? That is a bad habit that is easy to change.

Collect the necessary cleaners for each housing area and store them near it. You can place bathroom cleaners in a small plastic basket and put them on a shelf or under the sink. Use two baskets of consumables if you have bathrooms upstairs and downstairs.

Store furniture dusting products and tools together for quick access. And, of course, store all laundry products safely in the laundry room.

Accumulation of food in the refrigerator

If your family hates leftovers, why bother putting them in the fridge? If you will not use the food immediately, throw it away. Improperly putting away food advances the development of microscopic organisms and makes cleaning the refrigerator much harder.

Leaving the bed unmade

Whether the remainder of the room is perfect and spotless, an unmade bed makes it seem chaotic. Caring for your bed every morning is a habit that will encourage organising the rest of the room (and maybe the whole house).
Simplify the task by choosing bed linen that is easy to spread. A bed with ordinary blankets and pillowcases is much easier to fix than a bed with pretentious pillows.

Not reading the instructions

Have you ever had to perform a task again, such as cleaning soap scum from tiles, because the cleaner did not work? You may have yet to read the instructions.

Most detergents work slowly, and it takes some time for the ingredients to do their job to be easily cleaned or rinsed. Spend 30 seconds reading the instructions to avoid 30 minutes of extra rubbing.

Using surface irritants

Just as using too much detergent can be a bad habit, using too harsh detergent on the surfaces to be cleaned is also wrong. You can cause more harm than good if the cleaner damages the coatings or poses a danger to your pets and family.

A good example is chlorine bleach. Although it is a good disinfectant, it is not a suitable detergent, and fumes can be toxic. Utilise the gentlest cleaning items expected to accomplish results.

Dusting after cleaning

Save some effort by cleaning the dust before vacuuming. You must clean all rooms from top to bottom so that you can vacuum the dust afterwards.
Remember how a disinfectant cloth can’t effectively clean an entire bathroom? The same goes for duster cloths. Take a clean cloth when the one you use turns deep grey because you no longer catch dust. You push it with dirty dust.

Failure to complete tasks

Try to complete a task once you have started it. If you take out the ironing board, continue for a break on social media until you have finished ironing.
If you have only 15 minutes to clean, start arranging and placing the items correctly. Then, if you deviate, you can come back later to do a deeper cleaning.

Postponing the cleaning work until it becomes impossible

Delaying cleaning and waiting until the task becomes impossible is one of the most difficult bad habits you must stop. Most of us can’t meet this challenge and avoid it for as long as possible.

But cleaning the whole house will be easy if you and your family clean daily, loading and unloading the dishwasher, loading the laundry, and vacuuming one or two rooms.

Now, for a more positive outlook, here is a great list of cleaning tips to get you started on a sound footing.

Clever Tips For A Clean Home

A thorough cleaning is not a woman’s favourite way to spend her free time. Therefore, the shorter and smoother it is, the better. Here are ten clever tips for a clean home.

Tip 1
To clean the blender without much effort, you must first fill it with water and drop 1-2 drops of dish detergent. Then turn on the blender for a few seconds until the water turns. Finally, pour out the old liquid, rinse and dry.

Tip 2
If you want to remove dark stains from the tub without spending hours rubbing it, you must pass it with a grapefruit cut in half and a little salt. In addition, this way, your bathroom will smell like citrus fruits.

Tip 3
To remove the accumulated limescale on the bottom of the kettle, pour water into it, and add two tsp. of vinegar, and wait until the liquid boils. Then rinse.

Tip 4
Used tea bags to clean glass surfaces and dishes from residual grease stains.

Tip 5
You will clean the joints in the bathroom without any problem with water and alcohol, or vodka. After spraying the tiles with the prepared “detergent”, wait about 10 minutes. During this time, the alcohol will break down the dried soap and dirt. Then rinse. Remember that this method not only cleans but also disinfects the bathroom.

Tip 6
The dried glue, caused by half-peeled labels on jars and new dishes, will be removed without much rubbing if you pass the place with nail polish remover.

Tip 7
Burnt pots will shine again if you sprinkle the bottom with baking soda, sprinkle some water on top and wait about 3 hours until the home cleaner breaks down the sticky residue.

Tip 8
To protect the curtain in the bathroom from mould, you need to soak it in a solution of salt and water before hanging it. If you decide to wash it, put it in the washing machine with a few towels and add 4-5 drops of lemon juice into the washing powder.

Tip 9
The windows of the shower cabin will not look dirty and with drops of water if once a month you pass them with a towel on which you have dropped a few drops of essential oil of lemon. That will make the water easier to wash off without drying the glass.

Tip 10
The creaking door will no longer make ugly noises if you lubricate its hinges with vaseline. Pencil graphite has the same effect.

How to deal with house dust?

House dust is the enemy of many housewives. Sometimes more than regular home cleaning is needed to deal with its presence. Here are some tips to help keep house dust out of your home.

  1. Clean with a slightly damp cloth – this way, the dust sticks to the fabric and does not spread in the air. Household wet wipes also work.
  2. Always open the windows while cleaning. Fresh air must enter the room to displace house dust. If air currents occur, there is a risk of household dust spreading to other rooms.
  3. When cleaning, remember to dust decorative pillows, blankets, and bedspreads, as home textiles collect the most household dust. Regularly changing bed linen also helps to deal with the problem.
  4. Clean the vacuum cleaner bag every three uses. That prevents household dust from spreading through the air the next time you use the appliance.
  5. Most housewives wrongly think laminate flooring attracts more house dust than carpet or rug. The truth is that the dust accumulates no matter what the flooring is. The difference is that parquet cleaning is faster and easier, as contaminated areas are visible, while with carpets, household dust seeps into the fabric and requires special care.
  6. Keep the child’s plush toys in a unique basket or box, as their material attracts house dust.
  7. Maintaining higher humidity in the room means less static electricity, which is a prerequisite for reducing the amount of house dust on furniture and appliances.

Remember that the amount of house dust also depends on the location of your home. If you are on a busy street in a big city, house dust at home is inevitable.

Keep in mind these things when doing seasonal cleaning:

  • Act consistently. Do not clean two rooms simultaneously because it wastes more energy. When you focus on just one room, you save time and effort.
  • Clean the wardrobe. In this case, we are not just talking about removing clothes that no longer suit you or you are tired of. After removing everything from the closet/wardrobe, thoroughly clean the corners, which often become a “home” of various microbes and pests.
  • Wash the curtains. Some housewives try to save effort by washing only the windows without removing the curtains. But dusty curtains will only endanger clean windows. Remove the curtains and wipe the windows while washing. Stretch the curtains as soon as the washing machine finishes not to wrinkle and save on ironing.
  • Clean the carpets. Studies show that regular vacuuming eliminates 80% of carpet dirt. For the remaining 20%, ​​you need to take extra care. If you do not intend to wash the carpets, wipe them with a wet towel to pick hair and refresh the colour.
  • Pay attention to the locker in the bathroom. Expired cosmetics are often collected there. Throw away everything you haven’t used in months and aren’t sure if it’s still durable. It is better to buy a new product than to get a rash.
  • Clean the refrigerator. After thawing, clean with a cotton cloth, paying particular attention to the corners where the mould collects. To smell nice, sprinkle cotton with vanilla and place it in the refrigerator.
  • In winter, people usually place the furniture closer to each other to create a feeling of warmth and cosiness. But when spring comes, you can make some adjustments to make the room look more spacious.

Most women do not imagine that cleaning the home can provide them with cleanliness and a slim figure.

A team of experts in the UK has calculated how many calories burn in various household activities, which can be a more effective means of losing weight than strict diets.

Sweeping the floor with a broom for an hour burns 153 calories. Washing it with a rag burns 187 calories in just 30 minutes. Rubbing the bathroom and toilet for 15 minutes helps you burn another 90 calories. A bonus is sculpting the biceps, which women can form during regular cleaning.

The effectiveness of cleaning depends on the size of the home. An average of 30 minutes of cleaning burns 119 calories. Washing the windows inside and out melts 167 calories in half an hour. Arranging your wardrobe will delight you with 85 calories less and perfectly folded clothes.

Equally important is to avoid time- and effort-costing mistakes and bad cleaning habits!
Well, what are you waiting for? Let’s grab the rags!

Holy Cow! Celebrity Tenancy Cleaning

I like my job as an end-of-tenancy cleaning team supervisor. But even on my brightest day, I would not call it interesting. Challenging, dynamic, demanding – but hardly interesting. A couple of weeks, however, something happened that might have changed my opinion on that.

We had received a standard pre-scheduled tenancy cleaning booking for a 3-bedroom apartment in south Chelsea, close to the Physic Garden. From all the details left by the tenant, the place was in excellent condition and did not look like a cleaning challenge. The only peculiarity was that the person who booked us would not be able to attend the final check-up, but she assured us that her landlady (in her early sixties) would. Contrary to what you may think, this happens quite often.

We arrived on time and immediately rolled our sleeves (the tenant had provided us with a key). The apartment was indeed very neat and well-kept. In just under three hours, my team was about done. I was just starting to throw an impatient glance at my watch, wondering if the landlady would ever appear, when the front door opened. In came a very beautiful lady in her late thirties (or at least she looked at that age).

I stopped dead in my tracks. A quick aside – I love watching TV, especially the new BBC and ITV shows. So I could recognise the woman in a couple of seconds – it was Suranne Jones! She immediately saw my reaction and jokingly said: “Let’s get this out of the way – yes, it’s me, and sure – we can take a selfie if you wish!” I managed to gather my last shreds of professionalism and declined the offer (barely!).

As it turned out, the apartment belonged to her parents, who had asked her to take care of the tenancy cleaning inspection. She couldn’t be sweeter and more cooperative – not a shred of celebrity pride about her!

Anyway, I could hardly expect to meet another big star on my next job. But this encounter made my year so far!

Powered by WordPress & Theme by Anders Norén